
When my husband and I moved into this house, I knew that I’d soon turn one of the spare bedrooms into a space tailor-made just for me. The two biggest items on my wishlist were to have a cozy reading spot and a craft room. It was easy to decide to make one of the bedrooms into a combo craft room/cozy reading nook. For this post, I’m just going to focus on the reading area/bed. You’ll get to see the rest later!
Here’s what the room looked like before:
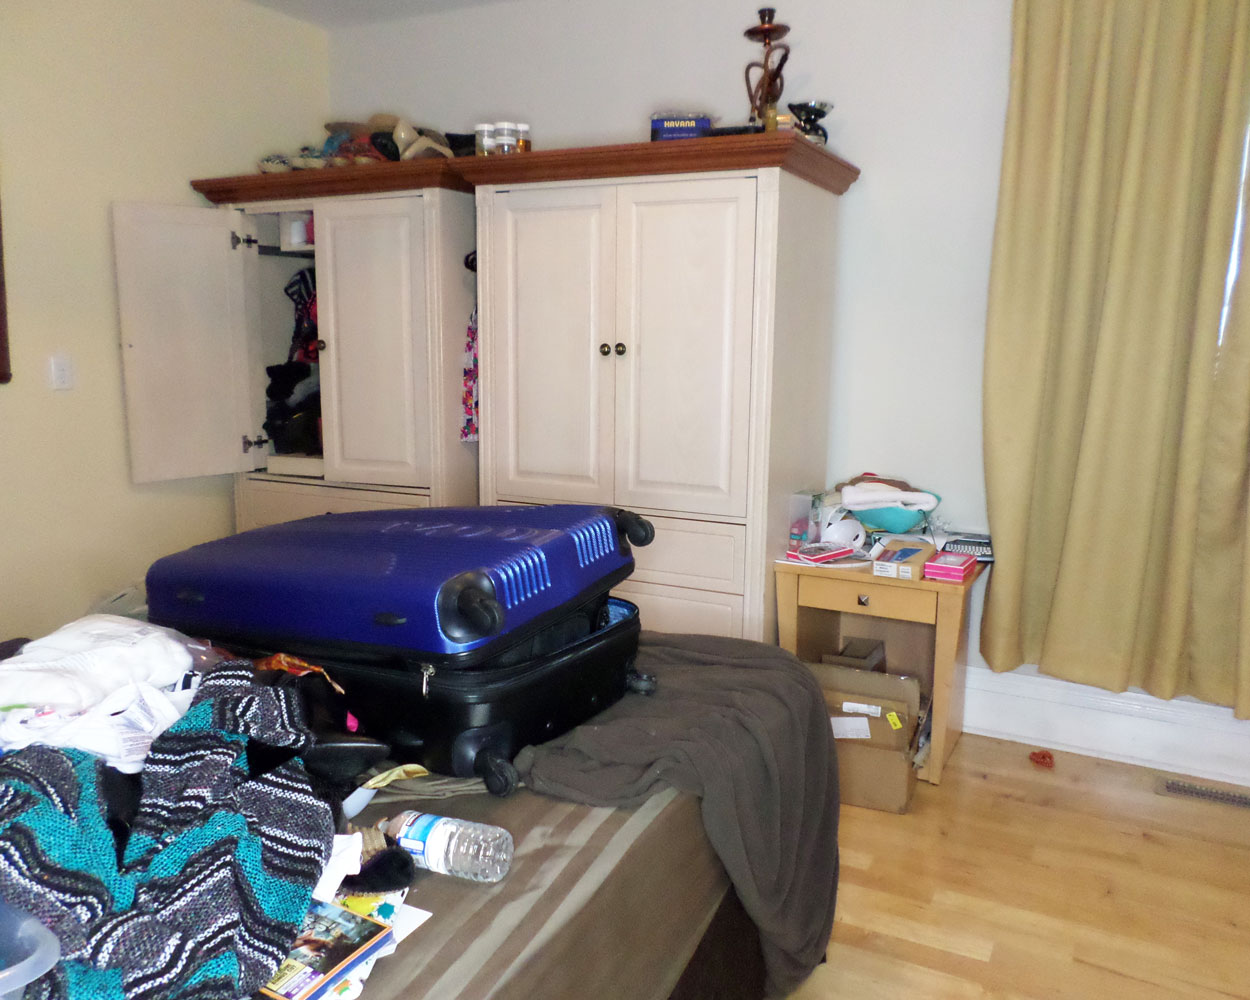
This is taken from the doorway. As you can see, the layout doesn’t work very well – the bed is awkwardly placed and those cabinets are way too big and clunky. I already knew I’d move the bed to the corner where those armoires are.
I’ve perused Pinterest way more frequently than I probably should and I keep seeing the most canopy beds. From dreamy mini-lights everywhere to pillows galore, the possibilities for what I could do were endless. Since I love doing things on budget, I took the same approach here. I went to Ikea and found sheer curtain panels on clearance for – wait for it – $5 for a pair!! Sold!
Now the real dilemma kicked in, though. I could not figure out how I was going to hang the curtain panels. I must have stared at that bed for days on end. I knew I couldn’t do a typical 4-poster bedframe because a) the ceiling fan wouldn’t allow space for that and b) I wanted to do this on a budget. I was going for a bohemian look in this room, but I couldn’t figure out how to get that haphazard-but-totally-works look that other people seem to achieve.
Then I had my “aha!” moment. It’s kind of weird, so bear with me. Weeks prior I bought a huge bunch of decorative bamboo sticks from the closing sale at Target Canada (RIP *sniff sniff*). I even thought, is this too crazy?? But me being me, I had to try it. I had to do something low-profile because of the aforementioned ceiling fan. I literally had a few millimeters to work with, so the bamboo would work technically. I just wasn’t sure if it would be strong enough to hold the curtains.
I put the curtains on the bamboo and it seemed strong enough, mainly because the panels are sheer and light. So far so good. To fasten them to the ceiling, I used brackets that are usually used to secure cables to a wall or ceiling. This is what it looked like (you can see the bracket I’m talking about, too):
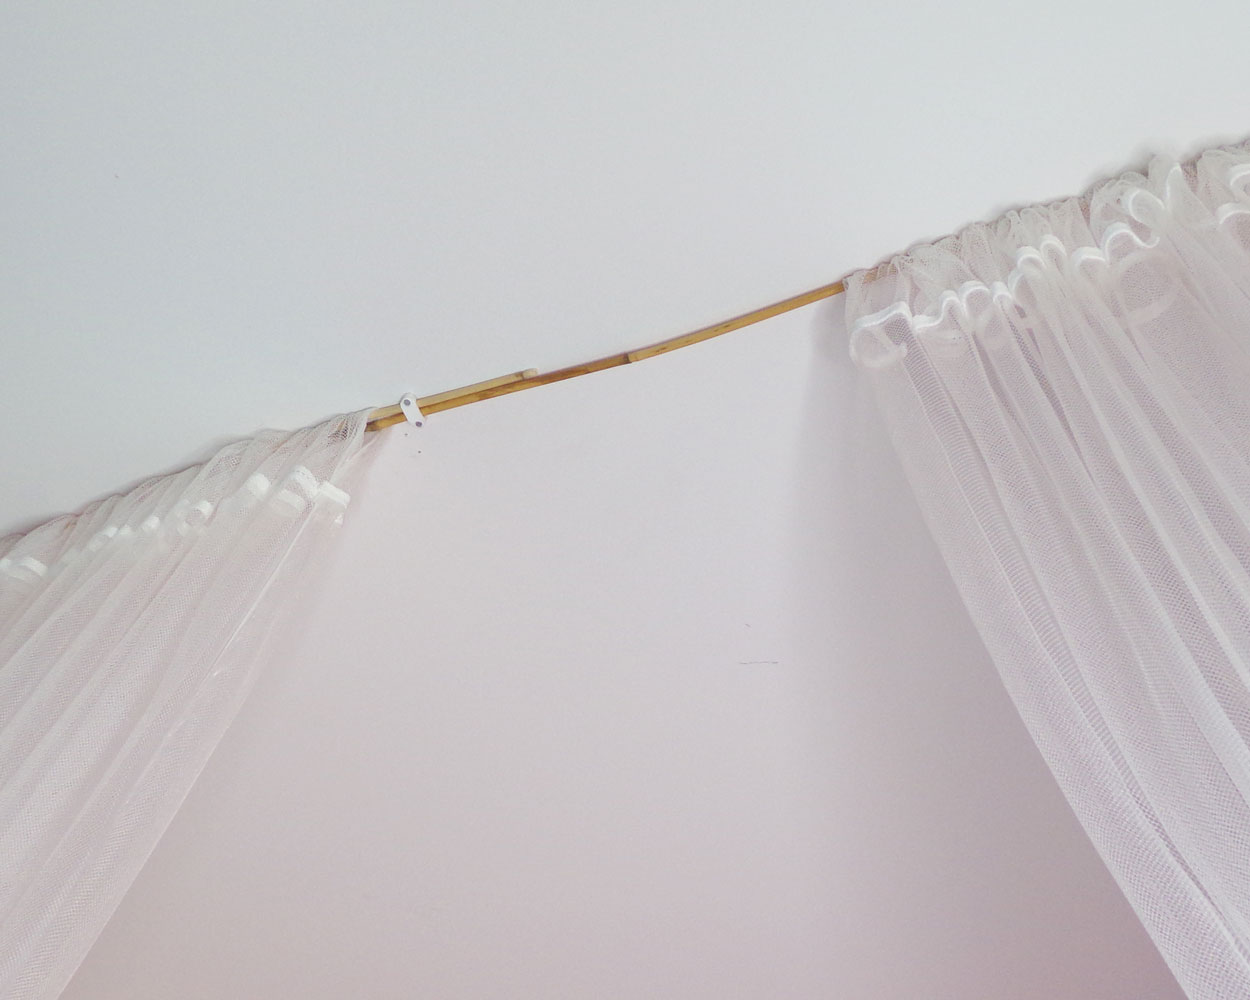
I made sure to use a few per stick, just to make sure it would stay in place. Once I got all the panels up, I was debating whether or not to put a row of panels along the pink wall, but I decided against it. I just love that wall and I didn’t want to cover it up!
Here’s how it turned out:
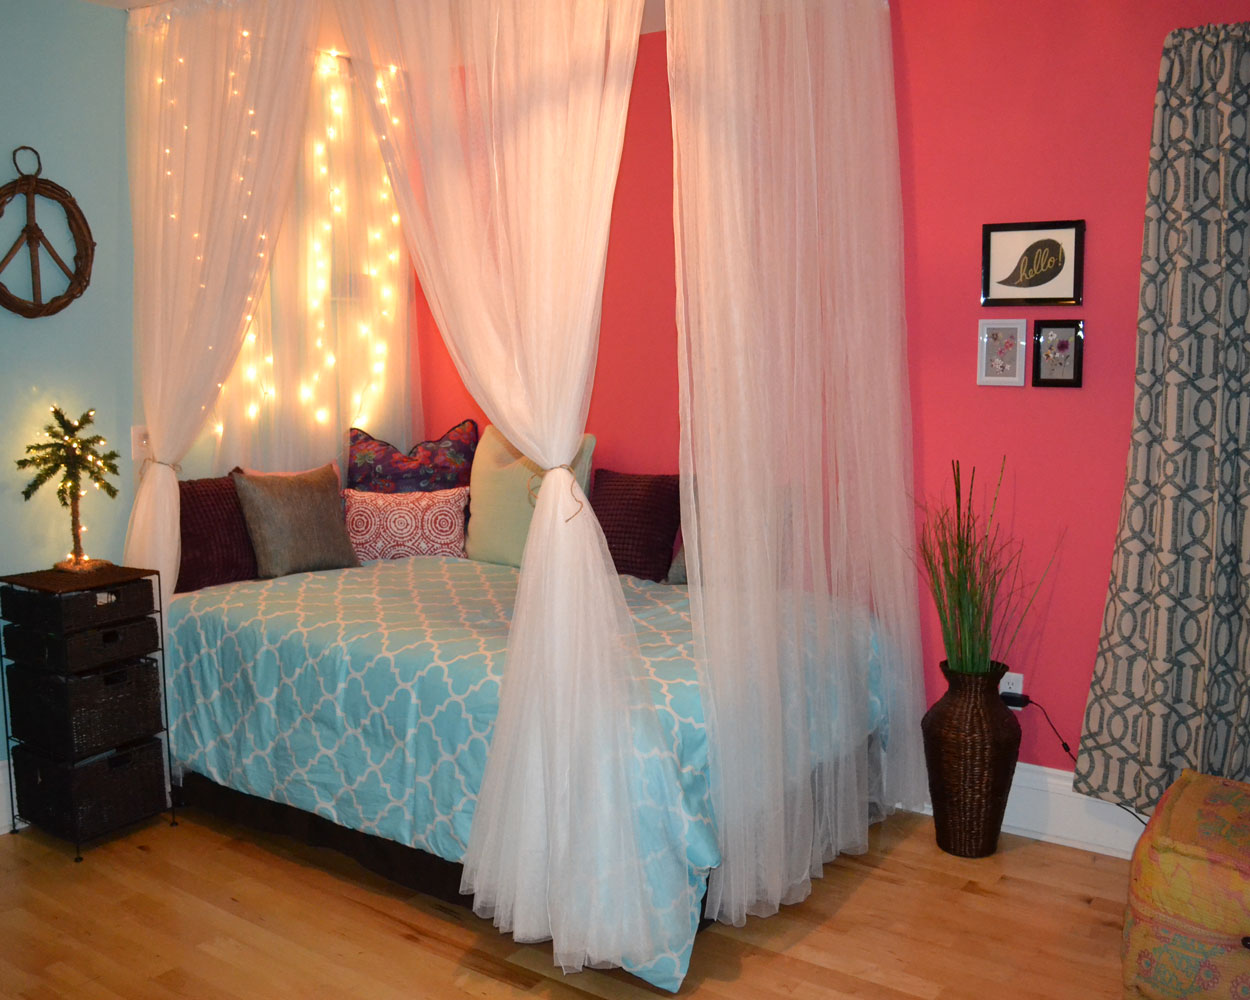
I am in love with this bed! I also added strings of mini lights behind the one panel to give it a more dreamy vibe. I also made sure to add lots of pillows to give it an even more cozy feeling. Here’s a before and after of the space:
Wouldn’t you just love to jump in there and read a good book? In fact, I think that’s what I’m going to do right now 😀


 fashion lover • interior decorator • canadian girl with a southern soul